
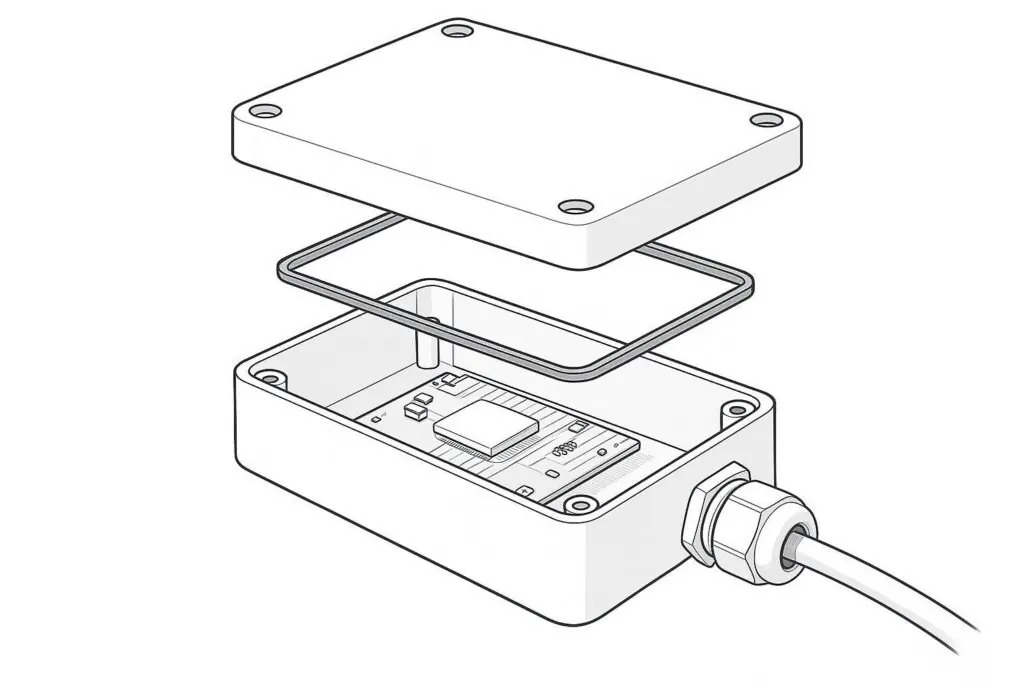
If you’re building an industrial control or sensor product, enclosure issues usually show up late: a gasket that doesn’t stay uniformly compressed, a seam that leaks EMI, a resin grade that doesn’t meet UL 94 at the actual wall thickness, or a sealed box that becomes a heat trap.
This is a decision-stage guide for teams preparing an RFQ. The focus is on requirements that are testable and manufacturable.
Start with the requirements, not the resin
Before you argue about ABS vs PC, write down four constraints. They drive most downstream decisions.
Ingress target: IP65 vs IP67 (and whether the unit is opened for service)
EMI/EMC goal: what needs shielding, over what frequency range, and cable/connector strategy
Flammability requirement: UL 94 rating (and documentation expectations)
Thermal budget: steady-state dissipation, hot-spot locations, and whether venting is allowed
If your product sits in the industrial operator-interface space, Deuchi Plastic’s Industrial HMI & Operator Controls page is a good example of the durability-first use cases where these constraints tend to stack.
Custom plastic electronic enclosure design choices that make or break IP ratings
Most IP failures are not “bad gasket material.” They’re design and assembly variability showing up as uneven compression.
Design for uniform gasket compression
A practical summary of gasket mechanics (compression ranges, groove fit, and why flex between fasteners matters) is outlined in Fictiv’s waterproof enclosure design guide. The point isn’t to copy a percentage—it’s to design a joint that keeps the seal loaded across tolerance stack-up.
For injection molded enclosures, that typically means:
Stiffness near the sealing land (ribs/geometry that reduce warpage)
Controlled clamp load (fastener type, washer strategy, torque control)
Hard-stop features to prevent over-compression
A sealing land that’s flat and smooth enough to avoid micro leak paths
⚠️ Warning: If a prototype only passes IP testing with hand-tuned screw torque, it’s not a prototype problem—it’s a production problem you found early.
Treat penetrations as separate sealing systems
Cable glands, connectors, display windows/light pipes, and screw paths can all become leak paths. Document how each penetration will be sealed and tested. This is especially important if you’re targeting IP67 and the product sees washdown or immersion scenarios.
EMI shielding for plastic enclosures: choose a method, then control the seams
Plastic doesn’t provide EMI shielding on its own. Most programs use one of three approaches:
Conductive coating (post-mold)
Plated plastic (post-mold metallization)
Conductive-filled resin (shielding built into the molded material)
Ferriot provides a straightforward overview of why plastic housings typically need secondary shielding methods in “EMI Enclosure Design: When Shielding Is Required for Electronic Systems”.
Assume the seam is the weak point
Even with a conductive inner surface, shielding performance can collapse if seams and apertures aren’t managed. RFQ-ready items to define:
Where the parting line is allowed (and where it isn’t)
Mating-surface flatness expectations and clamp-load strategy
Whether you need conductive gaskets / form-in-place gasket for continuity
Cable shield termination approach (often more important than “thicker coating”)
UL 94 V-0 plastic: specify the grade and thickness, then lock it in
UL 94 is a standardized flammability test for plastics. The common failure mode is specifying “UL 94 V-0” without tying it to the exact grade and minimum wall thickness on your part.
RTP Company lays out the criteria for V-0/V-1/V-2 (including drip behavior differences) in their UL 94 V-rating explainer.
Practical RFQ language is closer to:
Resin family + exact grade (and color, if relevant)
Required UL 94 class (e.g., V-0)
The minimum wall thickness where the rating must apply
Documentation: material certs, traceability expectations, revision control
If your design uses multiple materials (base, overmold, gasket, window), specify requirements per component.
Thermal management in an injection molded enclosure: decide “sealed” vs “vented” early
Thermal strategy changes completely once you commit to a sealed enclosure. Plastics are generally poor heat conductors, so you need a deliberate heat path.
If venting is allowed: you can use airflow (natural convection or fan-assisted), but you must protect the vent path so it doesn’t become your IP failure point.
If the enclosure must stay sealed: rely on heat spreaders/bridges (metal inserts/plates), external sinking, or thermally conductive gap fillers/potting where appropriate.
Treat thermal validation like any other requirement: define the operating profile, run worst-case thermal soak tests, and identify hot spots before you finalize tooling.
What to include in the RFQ and validation plan
A single appendix that engineering, quality, and sourcing can all sign will prevent rework later.
RFQ item | What to specify | What to validate in prototypes |
|---|---|---|
IP sealing (e.g., IP65 enclosure design) | Target IP rating, service model, expected fluids/cleaners, opening cycles | Jet/immersion test plan, torque sensitivity, leak paths |
EMI/EMC | Shielding target + seam strategy + cable/connector plan | EMC test in representative configuration, seam leakage checks |
UL 94 | UL 94 class, grade, min wall thickness, documentation | Material cert verification; confirm thinnest sections |
Thermal | Heat load, hot spots, ambient range, sealed vs vented decision | Thermal soak; identify hot spots and drift |
Manufacturing controls | Cosmetic zones, parting line limits, CTQ dimensions | Inspection plan; SPC/Cpk for CTQs |
Next steps
If you already have a 3D model or a draft drawing pack, a short DFM pass before tooling is often the fastest way to reduce risk on sealing lands, seam strategy, and tolerance stack-up.
If you’re building toward an end-to-end build (molding + assembly + packaging), Deuchi Plastic’s Contract Manufacturing page outlines how they support electronics enclosures where IP protection, EMI shielding, heat dissipation, and flame retardancy all matter.
For early design risk reduction, start with Deuchi Plastic’s DFM team and share your RFQ requirements pack. If you’re still finalizing resin selection, their overview on material selection for plastic parts is a useful baseline for aligning geometry, performance, and manufacturability.
If you’re also qualifying suppliers, their framework on choosing injection molding companies can help you turn “vendor risk” into a checklist.