
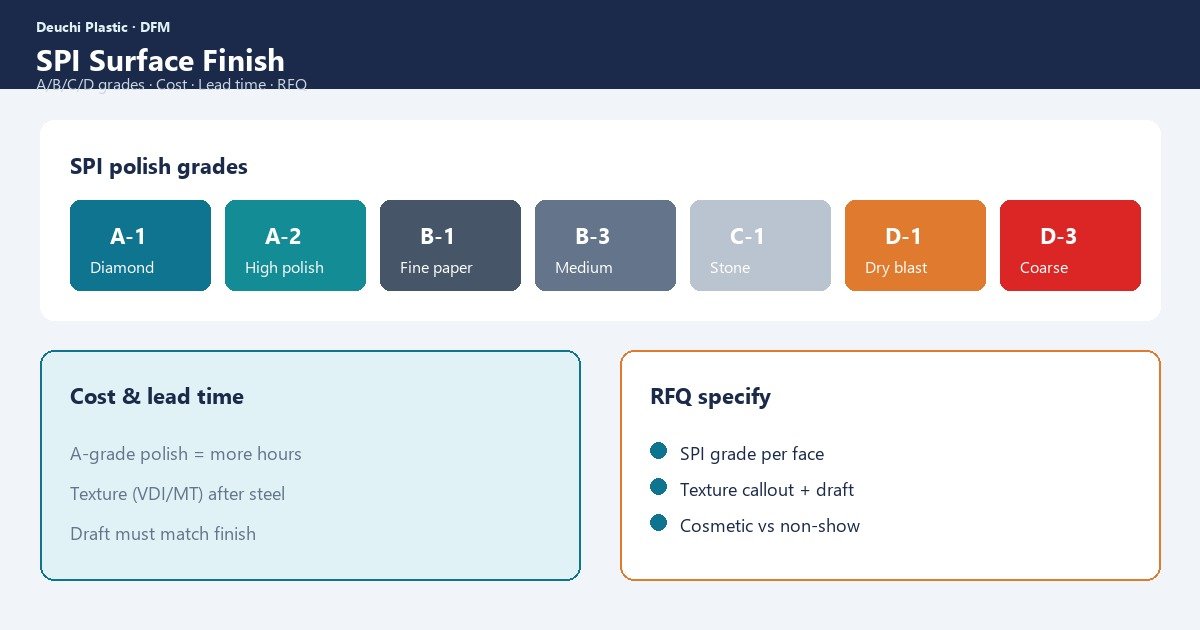
Surface finish callouts decide mold polish labor, texture lead time, cosmetic scrap rates, and whether a weld line or sink will be visible. Vague notes like “high polish” or “texture TBD” create quote gaps and T1 fights. Specifying SPI surface finish injection molding correctly lets buyers compare suppliers and protect Class A intent before steel is cut.
Procurement feels finish ambiguity as cost and schedule surprises — diamond buff hours, texture vendor queues, and re-polish after welding gates. Designers feel it as a mismatch between rendering gloss and molded reality. Quality teams feel it as undefined viewing conditions when SPI grade and cosmetic Class are not mapped together.
This guide explains SPI A/B/C/D for buyers, notes VDI textures, cost and lead-time impact, mold polish practice, cosmetic Class mapping, and RFQ specification language. Pair finish callouts with the DFM review checklist and draft requirements.
SPI A/B/C/D — what buyers need to know
SPI (Society of the Plastics Industry) finish grades describe mold surface condition ranges from mirror polish to rough stone. They are mold standards that correlate to part appearance, not a substitute for defining cosmetic zones and lighting.
| SPI grade (typical) | Characteristic | Buyer use case |
|---|---|---|
| A-1 / A-2 / A-3 | Diamond buff mirror range | High cosmetic / optical-adjacent |
| B-1 / B-2 / B-3 | Paper polish range | Good appearance, lower cost than A |
| C-1 / C-2 / C-3 | Stone finish range | Functional / industrial cosmetics |
| D-1 / D-2 / D-3 | Dry blast / coarse | Non-show, hide flow, grip |
- Call the specific grade (e.g., SPI A-2), not only “SPI A”
- Different faces can have different grades — map them on the drawing
- Material gloss response varies; same SPI steel looks different in PP vs PC
- Finish does not hide geometry defects — sinks and welds may show more on A grades
Resolve finish with gate vestige and weld placement in DFM so Class A faces are not fighting inevitable flow marks.
VDI and commercial textures — note for RFQs
Many programs use VDI 3400, Mold-Tech, or supplier texture books instead of (or in addition to) SPI polish. Texture depth drives draft requirements and visibility of defects. Always specify the texture standard number, depth/scale, and orientation — “light texture” is not purchasable.
- State texture standard and code on each face
- Pair texture with minimum draft (depth-dependent)
- Note whether texture is acid etch, laser, or bead blast
- Plan touch-up strategy if steel is welded later
Draft and texture interact — see draft-angle practice when deep VDI is specified. Mold concept reviews in mold build should include texture vendor lead time.
Cost and lead-time impact
Higher polish and specialty textures add skilled labor and outside processing time. Re-polish after engineering changes multiplies cost.
| Finish choice | Cost / lead impact | Program tip |
|---|---|---|
| SPI A diamond | High polish hours; sensitive to steel work | Freeze gates before polish |
| SPI B paper | Moderate | Often enough for consumer non-mirror |
| SPI C stone | Lower | Industrial covers, interiors |
| Deep commercial texture | Vendor queue + draft risk | Order texture early; lock CAD |
| Mixed finishes | Masking/protection complexity | Clear face map on drawing |
Quote packages should list finish by face so suppliers do not assume global A-2 on an entire tool. Hot-runner and multi-cavity tools amplify polish hours.
Mold polish practice and steel care
Polish is progressive: roughing to stones to papers to diamond compounds for A grades. Direction of polish can matter for optics and flow witness. Soft steels polish differently than hardened production steels; aluminum prototypes do not prove A-2 production cosmetics.
- Protect polished faces during tryout handling
- Plan rust prevention for idle tools
- Expect re-polish after welding gate moves or vent work
- Document polish direction if optical or high-gloss CTQs exist
Process settings still matter: mold temperature, moisture, and contamination create splay or haze that looks like “bad polish.” Separate steel finish issues from process cosmetics in tryout notes. Capture finish CTQs in first article inspection.
Cosmetic Class mapping — SPI is not enough
SPI defines mold surface; cosmetic Class defines what defects are allowed on the part under viewing rules. Map them together:
| Intent | Typical finish direction | Also specify |
|---|---|---|
| Class A show face | SPI A or fine B + controlled texture | Lighting, distance, defect limits |
| Class B secondary | SPI B/C | Allowed witness/weld rules |
| Class C functional | SPI C/D | Wear/grip needs |
| Non-show interior | As-machined or D | Ejector mark zones OK |
Weld lines and sinks show more on mirror finishes. Align finish upgrades with gate and rib DFM — and with warpage control if flat gloss panels are CTQ. Soft-to-steel appearance correlation follows the prototype-to-production roadmap.
How to specify finish in the RFQ
Use explicit language suppliers can price:
- Face-by-face SPI grade or texture code with hatching on drawings
- Cosmetic Class and inspection lighting method
- Draft tied to texture depth
- Forbidden defect types per zone (sink, weld, ejector, blush)
- Gate vestige location and max residual height
- Whether plated/painted finish will amplify telegraphing
Reference expectations from the OEM injection mold design guide in kickoff so polish and texture are scheduled on the critical path.
Build a finish critical-path into the mold schedule: steel soft milling, hardening if required, bench polish steps, texture vendor booking, and final protection. Texture houses often need weeks — ordering after T0 “when we see the part” is how launches miss market windows. Likewise, do not schedule diamond buff until gate locations and major venting steel work are frozen; welding a polished A-2 face is paid twice.
For painted or plated parts, specify whether the SPI callout is for the molded substrate appearance or for adhesion/tooth under coating. A D-blast that helps paint grip is the wrong choice for an unpainted show face, and an A-2 substrate may telegraph every weld after plating. State the end-use finish process on the RFQ so polish and texture match the real cosmetic system.
Keep a master finish map in PLM so ECO face changes update polish scope automatically. Orphan notes on old drawings are a frequent cause of wrong texture on revised tools. When a face changes Class, re-estimate polish hours and draft before approving the ECO — finish is tooling scope, not free artwork.
How Deuchi approaches SPI and texture specs
Deuchi reviews finish maps with gate, draft, and cosmetic Class in one DFM pass. We price and schedule polish/texture explicitly so RFQs do not hide A-grade labor.
Contract manufacturing FAI uses agreed lighting and zone maps so SPI callouts translate into measurable part acceptance — not subjective “looks glossy enough” debates.
FAQ
Is SPI A-1 always better than A-2?
A-1 is more labor-intensive and sensitive; it is not automatically “better” for every resin or part. Choose the grade that meets cosmetic intent at acceptable cost and maintainability.
Can texture hide sink marks and weld lines?
Deep textures can camouflage faint defects; fine textures and A-polishes make them more obvious. Do not use texture as a substitute for rib ratio and gate placement DFM.
Why did the polished tool look dull on PP parts?
Resin gloss, mold temperature, additives, and micro-texture from process affect appearance. Validate finish on the production resin, not only on steel photographs.
Should every face of the mold be the same SPI grade?
Usually no. Map grades by cosmetic need to control cost. Global A-2 on non-show interiors wastes polish hours and schedule.
Next step
Share face-by-face finish maps, texture codes, and cosmetic Class criteria for an SPI/texture DFM review before steel. Contact Deuchi at https://deuchiplastic.com/contact/ to align polish grade, draft, and FAI acceptance for your next mold program.