
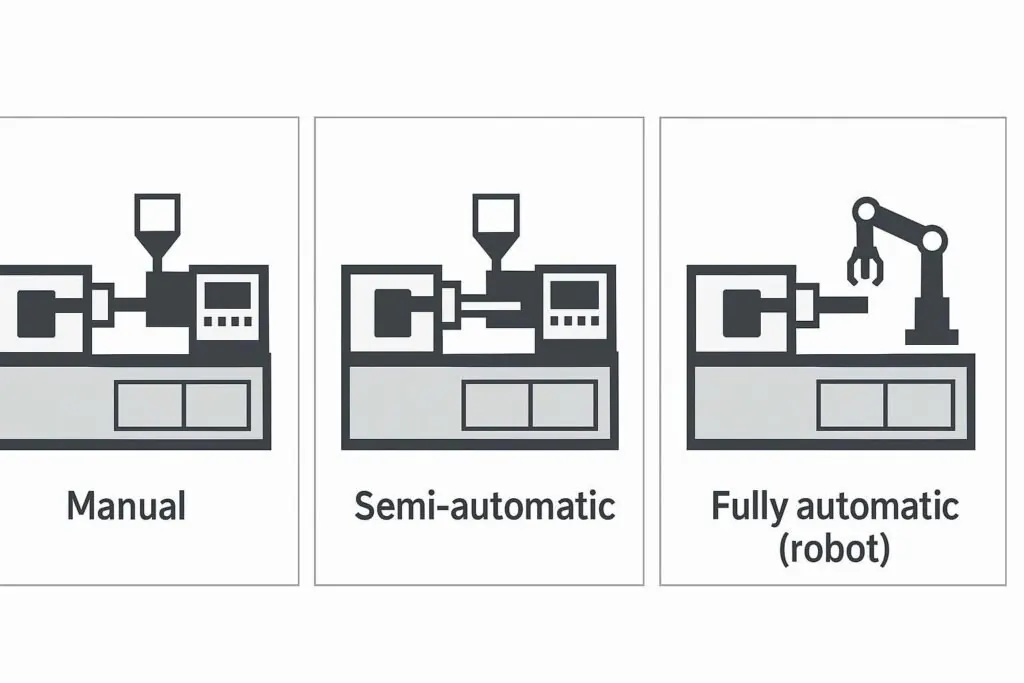
If you’re sourcing an injection-molded part, “manual vs semi-automatic vs fully automatic” can sound like a simple ladder: more automation equals better.
In practice, it’s a fit problem. The right choice depends on whether the part can release consistently, whether you need stable throughput, and how much operator intervention is acceptable without creating quality or safety risk.
This guide breaks down common injection molding automation levels and gives sourcing teams a framework to choose the right production setup before writing an RFQ.
Quick comparison matrix (what changes as automation increases)
Evaluation criterion | Manual setup (operator-driven) | Semi-automatic setup (operator-at-gate) | Fully automatic setup (robotic cell) |
|---|---|---|---|
What “automatic” means in practice | Human loads/unloads and handles most downstream steps | Machine cycles, but an operator action is still required between cycles | Cycles continuously with automated take-out and handling |
Where human intervention happens | Every cycle | Some steps every cycle (or frequently) | Exceptions and supervision, not routine cycle steps |
Consistency risk (typical drivers) | Timing and handling variation | Variation concentrates in remaining manual steps | Lowest—handling and timing are repeatable |
Best fit | Low-to-mid volume, high mix, frequent change, large parts that are awkward to automate | Medium volume, insert work, moderate complexity, phased automation | High volume, stable program, tight repeatability needs, safety/contamination control |
Tooling + cell requirements | Simplest tool features; flexible | Tool must release reliably; may add mechanisms | Tool release must be deterministic; integrated robot take-out + downstream flow |
Key Takeaway: Don’t start by asking “how automated is the mold?” Start by asking “what steps must be automated to make part release and handling repeatable?”
What “manual”, “semi-automatic”, and “automatic” actually mean
Different suppliers use the words differently, so align on definitions early.
Semi-automatic mode vs automatic mode injection molding
In many injection molding environments, semi-automatic operation means the machine completes a molding cycle but then waits for an operator step (often opening/closing the safety door and removing parts) before the next cycle starts. Paulson Training describes semi-automatic work as the operator waiting for the mold to open and then removing parts in the cycle workflow described in “Injection Molding Cycle and the Job of the Molding Machine Operator” (Paulson Training, updated 2024).
Automatic mode generally means the machine repeats cycles continuously without that “operator-at-gate” step, so part removal and handling must be designed to keep up without stopping the cycle.
These definitions matter for sourcing because they map directly to repeatability, staffing assumptions, and safety controls.
Manual vs semi-automatic vs automatic injection molding: decision criteria that actually change outcomes
Most RFQs treat “automation” like an equipment feature. For supplier selection, it’s better to treat it as a system question:
Can the mold release the part predictably every cycle?
Can the cell handle the part without damage (hot, soft, cosmetic, heavy)?
Can the workflow hold stable cycle-to-cycle timing?
The rest of this article explains what drives those answers.
Part release and handling: where manual steps become unavoidable
A procurement mistake is assuming automation is mostly about adding a robot.
For many parts, the gating factor is whether the mold can open and release the part the same way every cycle. If a part sticks, hangs on an undercut, or needs careful hand-guided removal to avoid damage, a “fully automatic” cell will still stop—because the human step didn’t disappear; it just became an exception.
In sourcing terms, ask the supplier to explain (in their own process language) how they’ve designed for:
ejection stability and part release
undercuts and side actions (slides/core pulls)
threaded features (strip vs unscrew)
cosmetic handling (how scuffs and marks are prevented)
If those are uncertain, many teams start with a setup that keeps the process stable while learning, then upgrade once release and handling are deterministic.
Consistency and quality risk: where variation usually comes from
Even if the injection machine controls melt temperature, pressure, and timing, the process still includes people and handling unless the cell is designed end-to-end.
Industry explanations of automation consistently link it with reduced human-caused variability and improved consistency.
A useful way to think about the three setups is where the variation “lives”:
Manual: variation is spread across handling, timing, and subjective inspection.
Semi-automatic: variation concentrates in the remaining manual steps.
Fully automatic: variation is minimized when take-out and downstream handling are repeatable.
If your part is tolerance-sensitive or surface-sensitive, ask the supplier to name the single biggest source of variability today—and whether it’s a manual step or an automated step.
Throughput stability and staffing model (without talking about price)
For sourcing teams, “efficiency” isn’t a buzzword—it’s about whether the supplier can produce predictable output with predictable staffing.
AIM Processing notes that automation for part removal and trimming helps maintain a more consistent machine cycle (less variability from manual steps) in “The Role of Automation in Modern Plastic Injection Molding” (AIM Processing, 2024).
Translated into procurement language:
Manual is flexible for engineering changes, but output depends heavily on operator availability and skill.
Semi-automatic can stabilize the machine cycle, but still relies on operators for specific tasks.
A robotic injection molding cell is most useful when the program is stable and the tool can run with minimal intervention; operators supervise, replenish, and handle exceptions.
Tooling and cell features that enable automation
Automation-friendly tools typically share a theme: they don’t require a human to complete the mold’s job.
Undercuts are a common reason a mold can’t be “hands-off.” Basilius notes hydraulic actuators are used in injection molds for applications such as slides and core pulls (and other mechanisms) in “Hydraulics Systems for Injection Molds” (Basilius Inc., 2020).
Threaded features can be another blocker. For buyer-level understanding of unscrewing mechanisms, MoldMaking Technology’s “Unscrewing Core Design Provides Fast, Accurate Core Positioning” (2006) is a useful primer.
When a supplier says “full auto,” confirm whether they mean:
the part is removed automatically (robot take-out or drop-out)
runner/sprue handling is automated
parts are transferred (conveyor, stacking, packaging flow)
any required inspection is handled without stopping the cycle
If the part still needs hand trimming, hand de-gating, or hand stacking every cycle, treat the setup as semi-automatic for planning.
Large-part realities: why manual is common (and when it becomes risky)
It’s often true that large parts run in more manual or semi-automatic setups, because the part may have long cooling times, be awkward to grip, and be sensitive to deformation or marks during handling.
But “large part = manual” becomes risky when the part is heavy enough that consistent handling is difficult over shifts, or when the part is hot/soft enough that small timing differences change dimensional results.
For many programs, controlled take-out and transfer is the first automation step that improves repeatability without turning the entire line into an unattended cell.
Multi-cavity injection mold: when it helps vs when it adds risk
A multi-cavity injection mold can increase output, but it also increases the need for stable processing and cavity-to-cavity consistency.
Nicolet Plastics emphasizes the importance of maintaining consistent quality across cavities over the tool’s production life in “A Guide to Multi-Cavity Molds for Mass Production” (Nicolet Plastics, 2025).
From a sourcing perspective, ask how the supplier:
validates balance cavity-to-cavity
monitors wear and drift over time
handles an issue affecting one cavity
Who should choose which setup? Three procurement-ready scenarios
Choose a manual setup when…
You’re early in the program (prototype or low volume), design changes are likely, and flexibility matters more than stable high output. Manual can also be appropriate when part handling is too variable to automate safely yet.
A practical next step is to run an early DFM pass to identify release/ejection risks before tooling. Deuchi Plastic’s DFM (Design for Manufacturing) approach is designed to surface those risks early.
Choose a semi-automatic setup when…
The machine cycle can be standardized, but specific steps still need human judgment (insert loading, selective inspection, controlled finishing), or you want a clear path to upgrade toward more automation later.
If you’re validating design and assembly fit before scaling, using Prototyping alongside early process trials can reduce surprises.
Choose a fully automatic setup when…
You have a stable program and need repeatable output over long runs, and you’re confident the tool can release consistently without “special handling” every cycle. At that stage, the question becomes tooling execution and validation discipline—how the mold is built for repeatable release and long-run stability. That’s the scope of Mold Build.
What to include in your RFQ so the supplier can recommend the right automation level
Give the supplier the information that determines release, handling, and quality risk:
annual volume (range is fine)
part size and weight
material and key requirements (mechanical, thermal, cosmetic)
tolerance-critical dimensions and measurement method
cosmetic surface requirements (and what defects are unacceptable)
inserts, overmolding, or any secondary steps
packaging/handling requirements (stacking, tray, bagging, clean handling)
any required documentation or validation steps
If you want a procurement-friendly walkthrough of how these inputs map to quoting and execution, Deuchi’s Injection molding RFQ process guide outlines the quote-to-shipment flow.
Next steps
If you’d like, share a basic part summary (size, material, annual volume band, and what “quality” means for you), and we can suggest which setup is most realistic—and what would need to change in the part or tool design to move up the automation ladder.
Brand note: Deuchi Plastic supports custom injection molding programs from DFM and prototyping through production, with a focus on precision, consistent quality, and reliable lead times.