
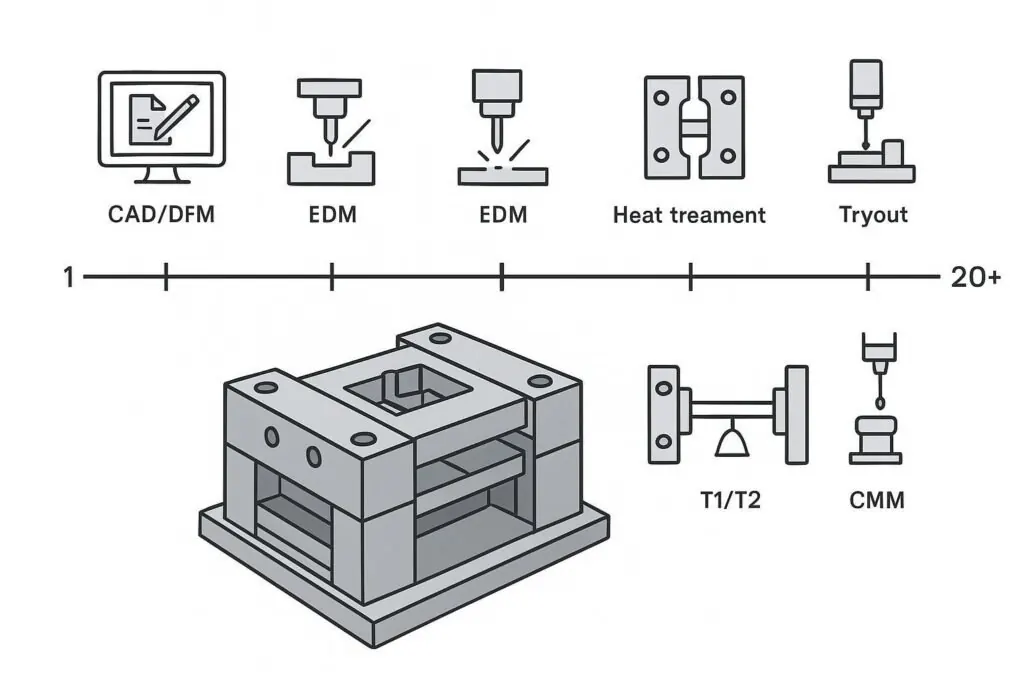
If you’re buying a complex multi-cavity injection mold with side actions, you’re not just paying for metal to be cut. You’re paying for a tool that closes cleanly, vents and fills predictably, cools evenly across cavities, ejects reliably, and holds dimensions after repeated cycles.
That’s why “at least 20 days” is a common floor for production-intent tooling, while “7 days” typically refers to a different class of tooling altogether.
This article gives you a practical comparison you can use in an RFQ: what has to happen, what tends to get skipped in a 7-day promise, and what evidence to ask for so your lead time turns into stable parts, not a rework loop.
Injection mold lead time: what you’re actually comparing
A common sourcing failure is treating these as the same product:
A 7–10 day rapid tool (usually intended for prototypes, bridge production, or lower volumes)
A production-intent mold (intended to run consistently, often at higher volumes, with tighter dimensional and cosmetic expectations)
This is the heart of the “rapid tooling vs production tooling” conversation: speed is achievable, but it has to match the tool’s intended life, tolerance, and validation scope.
Service providers that promote “rapid injection molding” often position it as a way to get parts in 7–10 days, but with clear tradeoffs in tool life, achievable tolerances, and surface finish compared to traditional production tooling (see Fictiv’s overview of rapid injection molding and its limitations).
So the right question usually isn’t “Why can’t you build my production mold in 7 days?”
It’s:
“What tooling class is this quote actually for?”
“What evidence will I receive before you call it ready?”
“If we need production intent, what steps are you not compressing?”
Injection mold manufacturing timeline: 7 days vs 20+ days (example)
This table is not meant to be universal. It’s meant to show what’s realistically compressible, and what tends to get pushed into post-delivery firefighting.
Stage | 7-day ‘rush mold’ (what’s common) | 20+ day production-intent mold (what you’re paying for) |
|---|---|---|
Requirements lock | Basic inputs, limited back-and-forth | Requirements pack reviewed and clarified (material, shrink, CTQs, cosmetics, volume assumptions) |
DFM + mold concept | Minimal DFM; “good enough” gating/ejection decisions | Documented DFM decisions on parting line, gating, ejection, side actions, venting strategy |
Cooling strategy | Simplified cooling; limited balancing between cavities | Cooling designed for stability (not just “it cools”), balancing across cavities where practical |
Steel/components | Uses readily available materials/components; substitutions likely | Steel and components selected to match life, finish, and wear; substitutions controlled |
Machining + EDM | Parallel machining with limited time for fine fitting | Machining/EDM scheduled with time reserved for fitting, shutoff refinement, and surface work |
Heat treat / hardness | Often minimized, avoided, or treated as optional | Heat treat/hardness treated as a quality gate for wear and dimensional stability |
Assembly + spotting | “Make it run” assembly; limited spotting time | Assembly with spotting/fitting time to achieve stable parting line and shutoffs |
First trial (T0/T1) | One quick trial, minimal iteration | Planned trials with time to correct what first shots reveal |
Measurement and report-out | Basic checks, limited dimensional evidence | Dimensional evidence and corrective actions captured (for many programs: inspection/CMM + change list) |
Release decision | “Ship the tool” and tune later | Release when the tool meets defined acceptance criteria, not when the calendar runs out |
A useful reference point: some molders describe sample phases like T0/T1/T2 with roughly one week per trial stage plus time for modifications, and emphasize that revisions and communication cycles drive the schedule (see EPower’s breakdown of T0/T1/T2 trials in an injection molding timeline).
That framing alone shows why a 7-day promise is fragile: one real iteration can consume the entire timeline.
Pro Tip: In your RFQ, ask the supplier to label the tool explicitly as prototype/bridge or production-intent, and define what “approval” means (samples only, samples + measurement, or samples + capability/validation).
What gets risky when you compress the schedule
For complex multi-cavity molds with slides/lifters (or unscrewing mechanisms), the high-risk shortcuts aren’t cosmetic. They create predictable failure modes.
Fit and shutoff quality (flash and mismatch)
If a tool is rushed, the most common hidden problem is fit: parting line, shutoffs, insert interfaces, and alignment of moving components.
That’s where you see:
Flash: plastic squeezing out at gaps
Mismatch: a step/offset at the parting line
These defects are widely recognized as common injection molding issues, alongside short shots, sink marks, and warpage (see Elastron’s overview of injection molding defects and troubleshooting).
The business risk: flash isn’t just a cosmetic complaint. It adds rework, inspection burden, and in many cases creates a quality-escape risk.
Fill and venting debug (short shots and burn/flow issues)
A 7-day tool often leaves little time to debug fill balance across cavities, venting, and gate behavior.
That typically shows up as:
Short shots (incomplete fill)
Flow hesitation, burn marks, or cosmetic instability
If your part family is sensitive to venting or you’re filling multiple cavities through a runner system, one “fast tryout” can be misleading. You might get a part that looks okay at a narrow set of conditions, then falls apart as soon as you change resin lot, press, or cycle time.
If your team needs a deeper explanation of what incomplete fill is telling you, DEUCHI’s explainer on injection molding short shots is a good reference for troubleshooting language.
Cooling balance (warpage and sink)
Cooling is where “it works” becomes “it runs.” If the cooling strategy is simplified to save build time, you usually pay for it later.
Cooling shortcuts tend to show up as:
Warpage (uneven shrink from uneven cooling)
Sink marks (shrink over thick sections when packing/cooling isn’t balanced)
Again, these are standard defect categories, but the key point for sourcing is this:
A rushed mold can produce “acceptable” first samples and still be unstable as a process.
A practical checklist to evaluate a 7-day tooling promise
Use this as a comparison framework in your RFQ. You’re not trying to punish a supplier for being fast.
You’re trying to learn whether the schedule is fast because they’re efficient, or fast because they’re skipping gates.
1) Ask what class of tooling it is
Request a one-line statement in the quote:
Prototype/bridge tooling, or production-intent tooling?
Target volume and expected tool life assumptions?
Any known limitations (tolerance, finish, abrasive materials)?
If the answer is vague, that’s the signal.
2) Ask what “approval” includes
A supplier can claim success with very different definitions:
“Parts shot”
“Parts shot + basic measurements”
“Parts shot + inspection/CMM report + documented corrective actions”
If you operate under PPAP/FAI-type expectations, align that up front.
3) Ask what trials are planned (and what happens after T1)
Even if you don’t use the exact T0/T1/T2 terminology, ask the supplier to describe:
how many trials are assumed,
what they measure after each trial,
and what happens if the part misses a CTQ.
EPower’s timeline explanation using T0/T1/T2 is a decent vocabulary reference if your team wants common language.
4) Ask for the evidence artifacts, not just promises
Depending on program criticality, you can ask for items like:
DFM signoff notes (parting line, gate, ejection, side actions)
Cooling layout summary (even a screenshot-level explanation)
Steel spec + hardness/heat treat certificate (when applicable)
Trial report: what changed between trials and why
Dimensional report tied to your drawing
This is also why supplier selection is an engineering activity. If you want a broader framework for evaluating molders, see DEUCHI’s guide on choosing injection molding companies.
When a 7–10 day tool can be the right move (and how to scope it safely)
A fast tool can be the right decision when your real goal is learning, not running a stable long-life process.
A few good-fit scenarios:
You need functional prototypes in the real resin.
You need bridge volume while the production-intent mold is being built.
You expect design changes and want “steel-safe” iteration.
In those cases, it helps to be explicit that you’re buying rapid tooling, and to accept the tradeoffs that providers like Fictiv call out in their rapid injection molding guide.
If your part’s material choice drives shrink, warpage risk, or cosmetic constraints, it’s also worth aligning material and DFM assumptions early. DEUCHI’s material overview on ABS vs POM vs PC vs PP (with DFM notes) can help your team frame the discussion.
⚠️ Warning: The most expensive outcome is paying for a “7-day production tool,” then discovering you actually bought a prototype tool that now needs weeks of remediation.
Next steps
If you want to de-risk your tooling timeline, the simplest move is to treat lead time as a set of gates with evidence, not a single promised date.
If you’re preparing an RFQ for a complex mold (multi-cavity, side actions, tight tolerances), DEUCHI Plastic can review your requirements pack and propose a build-and-validation timeline that matches your risk level. You can start by exploring DEUCHI Plastic.
If steel selection and tool life are central to your program, you may also find our internal guide useful: “Choosing Steel to Control Injection Mold Cost & Tool Life.”