
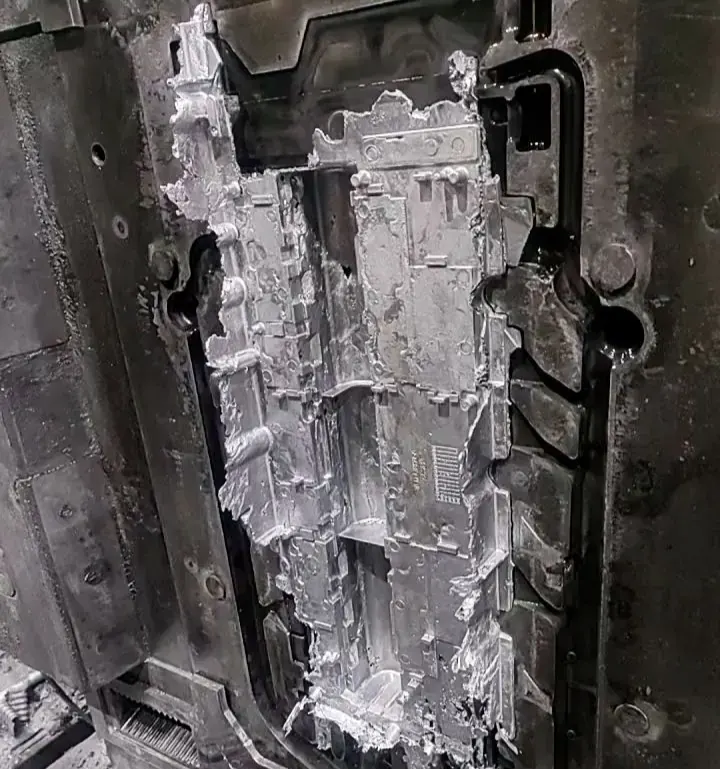
If you’ve ever heard that sharp “pop” on mold opening—or watched a part refuse to let go of the core—you already know why sticking is more than an annoyance. It’s downtime, cosmetic scrap, and (in the worst cases) a fast path to damaged steel.
This article is written for process engineers and production technicians. It explains why parts stick, what the common root causes are, and how to respond safely based on severity. The goal isn’t a one-off rescue; it’s getting back to a stable process window that doesn’t rely on luck or extra spray.
What “parts sticking” really means (and why location matters)
Before you touch the press settings, confirm where the part is sticking. “Sticking” is a symptom, not a single defect.
Core-side sticking (most common): the part shrinks onto the core and won’t release cleanly. This often shows up as drag marks, scuffs, or the part staying on the core even when the cavity half opens fully.
Cavity-side sticking: possible when texture/finish or vacuum effects dominate on the cavity side.
Parting-line / shutoff sticking: the part is being held by shutoff geometry, flash/burrs, or localized interference at the parting line.
Ejector-related sticking: the part releases from the steel, but hangs on pins/blades/sleeves, or the ejection system leaves witness marks because it’s doing “extra work” to overcome friction.
A quick diagnostic trick: use a marker, dry film, or other shop-approved method to reveal where contact is high. The contact pattern usually tells you whether you’re fighting geometry (draft), steel condition, process packing, cooling imbalance, or material behavior.
Why parts stick to the core: parts sticking in injection molding
In simple terms, parts stick because they shrink onto the steel and there isn’t enough “release margin” to break contact cleanly.
Three things set that margin:
Draft angle (geometry that allows the part to move)
Surface condition (how much friction exists at the interface)
Stress/shrink dynamics (how tightly the part is gripping the steel at ejection)
When any of these go the wrong direction, you don’t just get harder ejection—you get a higher chance of scuffing, tearing, or tool damage.
Key takeaway: If sticking is severe, treat it as a risk management problem. Don’t “muscle” the part out and hope for the best—find the root cause and escalate safely.
The four root-cause buckets (and what to look for)
On the shop floor, most sticking problems fall into one (or a combination) of these buckets:
Insufficient draft angle
Mold surface problems (finish, wear, scratches, rust/galling)
Process parameters that increase grip (especially pack/hold and thermal balance)
Material effects (resin family, reinforcement, moisture sensitivity)
1) Insufficient draft angle (or draft that’s “functionally” insufficient)
Draft is the first thing to suspect when:
the part sticks on tall walls or deep ribs
you get drag marks in the direction of ejection
the part releases with an audible “bang” and then shows marks
Many design guides recommend ~1–2° draft as a common baseline, with ~0.5° often cited as a practical minimum on vertical faces depending on geometry and appearance requirements. Protolabs summarizes this in its draft guidance: Protolabs’ draft guidance for injection-molded parts.
Where teams get surprised is when draft that looks “OK” on a print becomes insufficient in reality because of:
Texture: texture increases friction. It’s common to add draft for textured surfaces; one practical rule-of-thumb range is ~3° for lighter textures and ~5°+ for heavier textures (texture depth and part depth still matter). See Fictiv’s draft angle guidelines (2024).
Polish direction vs. ejection direction: even a good finish can behave badly if polishing marks run against ejection. It doesn’t take much to turn the surface into a “one-way” friction pattern.
Local geometry acting like an undercut: shutoffs, ribs, and transitions can create micro-mechanical lock even when the nominal wall draft is present.
What to do first (process engineer view):
Don’t jump straight to “add draft.” Confirm where it’s gripping (tall walls, ribs, shutoff, texture).
If the part is consistently sticking in the same zone across runs, draft/finish is usually in the top two suspects.
2) Mold surface problems (roughness, scratches, wear, rust)
A small surface problem can multiply the force required to demold:
Scratches / wear: increase real contact area and create mechanical “keys.”
Light rust or corrosion: adds friction and can create localized high spots.
Galling: turns the interface into a tearing/scuffing event.
If sticking is worsening over time, or a tool that used to run fine suddenly starts sticking, surface condition becomes more likely.
What to check:
core finish in the stick zone (look for rust haze, micro-scratches, dulling)
ejector pin faces (mushrooming, burrs)
lifter and shutoff surfaces (burrs, wear steps)
vent areas (plastic deposits can change contact and vacuum behavior)
3) Process parameters that increase “grip”
Process can’t fix bad draft or damaged steel—but it can create sticking even when the tool is basically correct.
Overpacking / excessive hold pressure or hold time
Overpacking increases internal stress and keeps the part tighter against the steel during the moment it should be releasing. Plastics Technology includes pack/hold among common levers in its troubleshooting coverage: Plastics Technology’s troubleshooting notes on sticking parts.
Signals you might be overpacked:
part weight creeps up with longer hold
gate seal time isn’t understood/controlled
sticking gets worse when you increase hold pressure/time
Mold temperature too low—or thermal imbalance that makes shrink uneven
Teams often assume “colder mold = easier release.” In practice, a too-cold mold can:
freeze the skin early
lock-in stress
create uneven shrink patterns that increase local grip
More common than “too cold” is imbalance: one side or one zone stays hotter/colder, so shrink isn’t uniform. The part releases on one side and clamps on the other.
Uneven shrink from cooling and geometry
Even with “good settings,” geometry and cooling layout can produce uneven shrink:
thick-to-thin transitions
ribs/bosses near a cosmetic wall
hot spots from blocked/inefficient cooling
When the part grips only in one corner or on one rib cluster, think cooling imbalance + geometry.
4) Material effects (PC, PA, and glass-filled resins)
Some materials are simply less forgiving:
PC (polycarbonate): often requires higher pressures and can be less tolerant of marginal draft/finish.
PA (nylon): moisture sensitivity matters. Improper drying can destabilize processing and shrink behavior.
Glass-filled materials: increase abrasion risk. Over time they can create micro-scratches that make future sticking worse, and anisotropic shrink can make release less uniform.
Material rarely acts alone—it amplifies draft, finish, and process issues.
Safe troubleshooting by severity (without hurting the tool)
The wrong recovery action can turn a “sticking part” into damaged steel, broken ejectors, or a safety incident. Use a staged response.
Light sticking (part releases with marks or needs extra eject)
Goal: reduce grip and verify you’re not masking a tool issue.
Try, in order:
Reduce hold pressure and/or hold time (small steps). Watch part weight and critical dimensions.
Reduce shot size slightly if you’re consistently overpacking (only if fill is stable).
Switch to manual/controlled ejection and confirm the part isn’t being ejected while still “too hot/soft” in a way that increases drag.
If needed, treat mold release troubleshooting as a diagnostic step: use a minimal, controlled amount of release agent (if your downstream requirements allow it) to confirm the sticking zone is friction-driven.
Pro tip: Track the “anti-sticking window” like a defect limit: an upper bound on hold pressure/time and a minimum cooling time where release is stable.
Moderate sticking (part hangs on core; repeated attempts risk scuffing)
Goal: create controlled separation without prying or shock-loading ejectors.
A practical, low-damage approach is:
Uniformly warm the sticking zone (shop-approved method) so the steel expands slightly and the plastic at the interface softens just enough to relax the grip.
Use non-marring tools and gentle, even force to create a small gap at the edge—then let release agent wick into the interface if allowed.
Important safeguards:
Avoid concentrated heat that creates thermal shock or distorts alignment.
Avoid steel tools that can nick the core.
If you have to hit harder each cycle, stop. You’re past “moderate.”
Severe sticking (risk of damage or unsafe force)
Goal: protect the tool and people.
If the part is truly locked on and normal controlled methods don’t work, disassembly is often the only safe path. Severe sticking is where teams break ejector systems, chip edges, or damage shutoffs.
⚠️ Warning: If you’re at the point of aggressive prying, uncontrolled hammering, or repeated high-force ejection attempts, stop and escalate to tooling. The cost of a damaged core is usually far higher than the downtime of a controlled teardown.
Scuffing as a symptom: what it usually means
When operators describe “scuffing,” they’re usually describing visible surface damage caused by friction during release.
In injection molding scuffing cases, the corrective actions that matter most are typically:
increase effective draft (including for texture)
restore/maintain steel finish (remove rust, address scratches)
reduce grip drivers (overpack/hold, hot spots, imbalance)
Prevention: design + tool finish + process window
Once you’ve survived the incident, prevention is where you win back uptime.
Build in enough draft (especially for texture)
Treat draft as a functional release feature, not “nice to have.”
For textured surfaces, plan additional draft from the start. Draft angle for textured surfaces usually needs to be higher than for polished steel because texture increases friction.
Keep polish direction aligned with ejection
Polishing marks that oppose ejection can behave like a micro-file.
If a cosmetic surface must be directional, document the direction relative to ejection in tool build/rework notes.
Maintain steel condition
Rust prevention and correct storage matter.
If you run glass-filled materials, schedule periodic inspection for micro-scratching in high-contact zones.
Establish an “anti-sticking” process window
For each tool/material combination, define and document:
hold pressure upper limit (beyond which sticking/scuffing increases)
hold time cap (based on gate seal study, not habit)
mold temperature range (and acceptable ΔT across zones)
minimum cooling time for stable release
If you treat these as controlled limits (like flash limits), sticking becomes predictable instead of mysterious.
FAQ
Is sticking always a draft problem?
No. Draft is a common root cause, but sticking can also be driven by surface condition (rust/scratches), overpacking, thermal imbalance, or material effects. The location pattern tells you where to look first.
Why did sticking suddenly start on a tool that used to run fine?
Common reasons: surface degradation (rust, wear, deposits), a process change that increased pack/hold, cooling circuit issues, or a resin/lot change that altered shrink and friction.
Is mold release an acceptable fix?
It can be a short-term stabilizer or a diagnostic aid, but it can also mask the real cause and introduce downstream issues (painting, bonding, contamination). Treat it as a tool—not the strategy.
Next steps
If your team is seeing recurring core sticking or scuffing, the fastest path to a stable run is usually a combined review of draft + surface condition + ejection design + the pack/hold and temperature window.
Deuchi Plastic supports customers with DFM reviews, tooling build/maintenance, and process troubleshooting to reduce repeat sticking events—especially on tight-tolerance parts and abrasive materials.